

May 11, 2026
How Storm Damage Affects Roof Repair Coverage


SUMMARY
|
North Carolina homeowners regularly face unpredictable and severe weather. Strong storms, sudden weather shifts, and intense seasonal changes can all put significant stress on residential and commercial roofs.
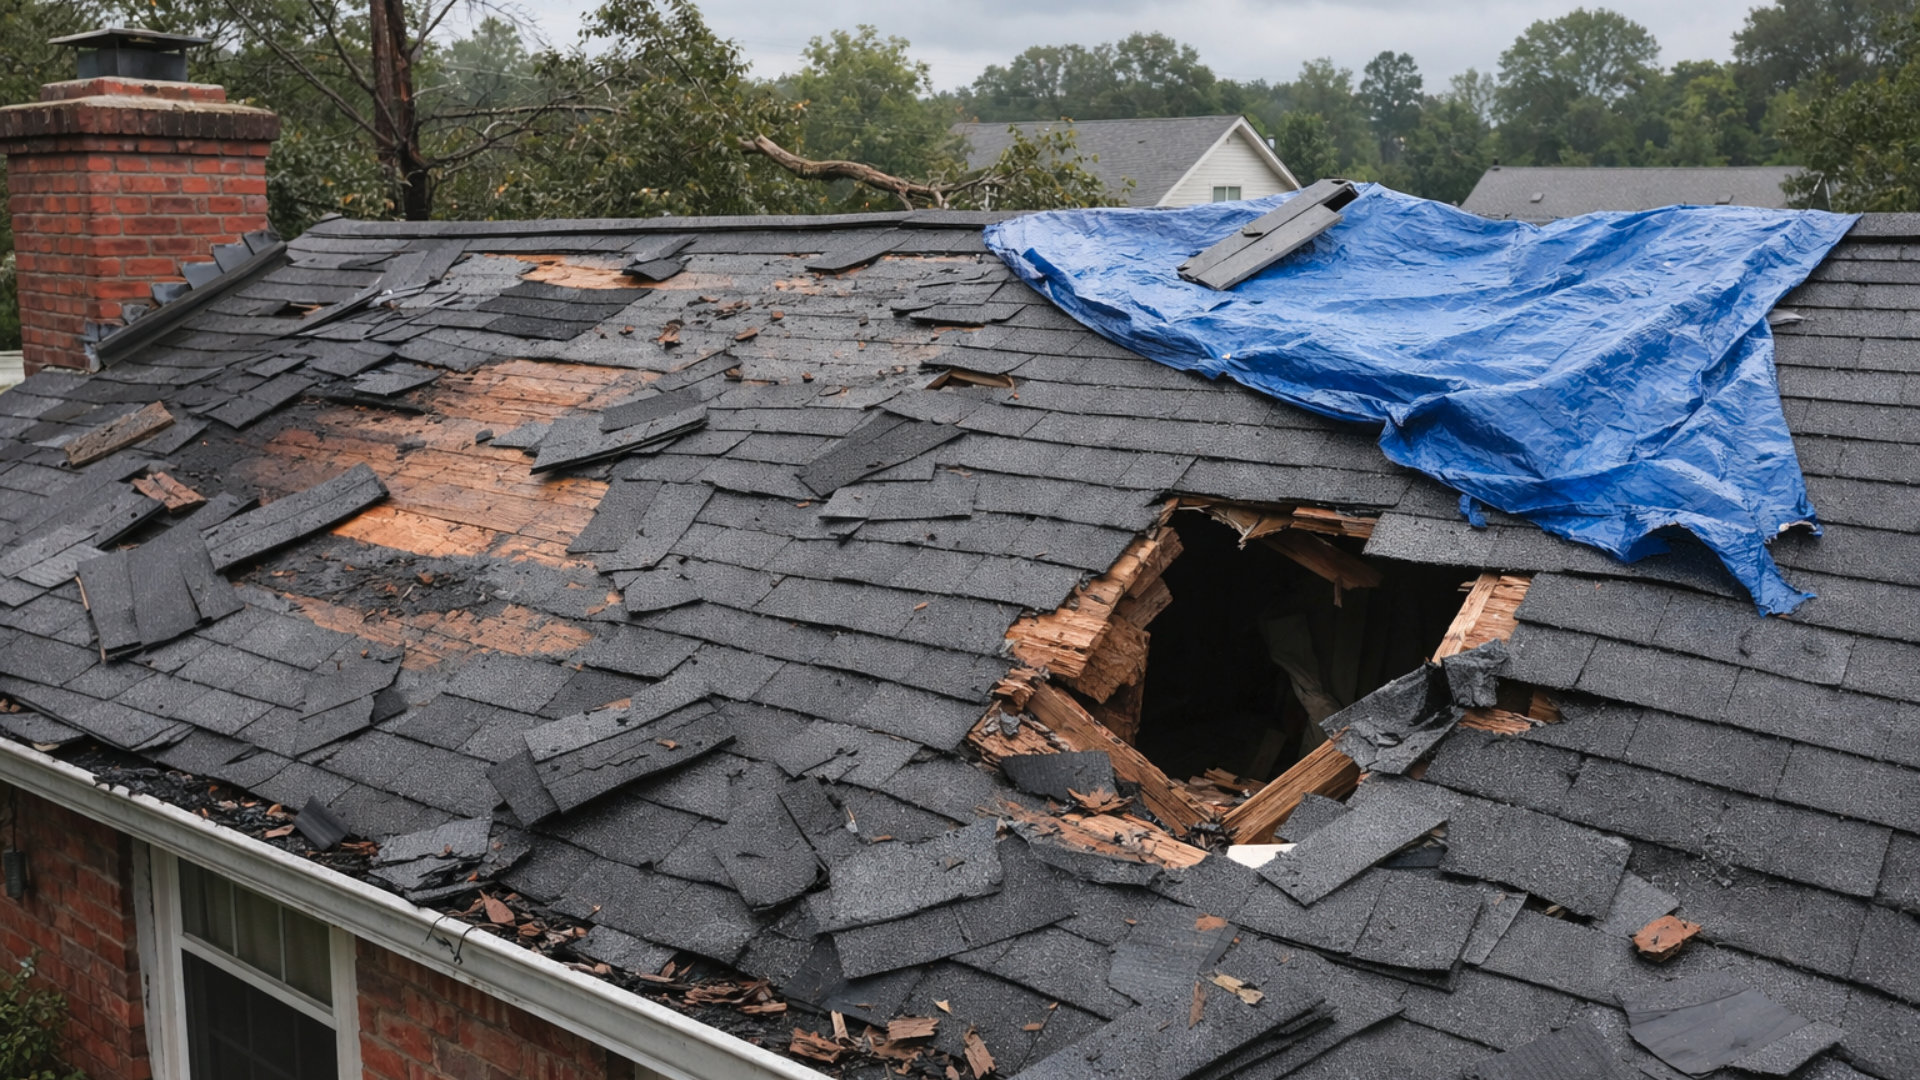
Hurricanes and tropical storms often bring powerful winds, heavy rainfall, and flying debris that can damage shingles, flashing, and other roofing components. Even after the storm passes, small issues like loose shingles or minor leaks can gradually turn into serious structural problems. Weather events like these are not uncommon in the state.
In fact, North Carolina has experienced 121 billion-dollar weather disasters since 1980. Because of these frequent weather threats, homeowners should know how to check their roofs both before and after the storm.
For this, the detailed roof inspection checklist can help identify problems early and prevent costly repairs later.
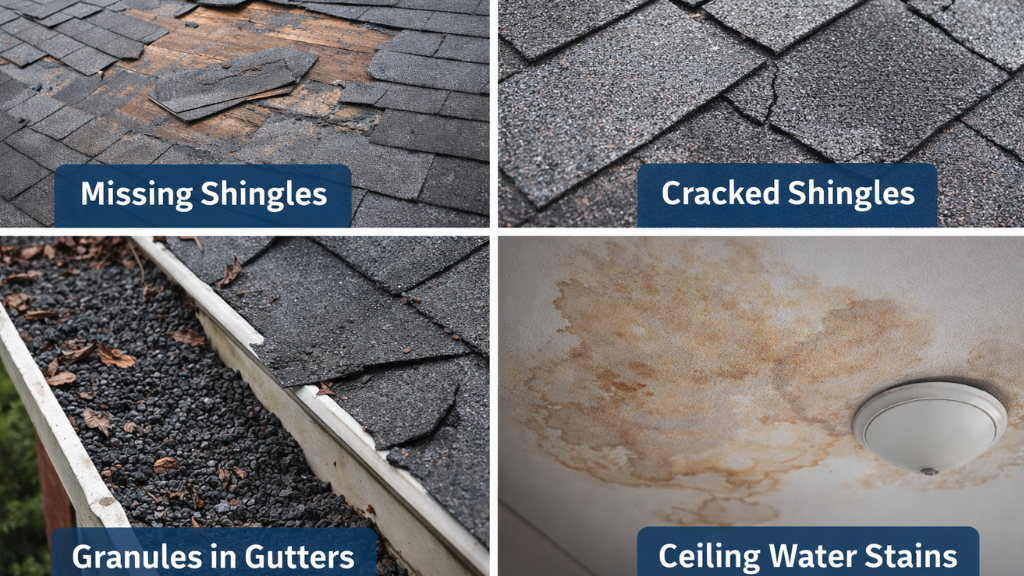
Start with a quick visual check around your home. Look for –
These simple signs can quickly indicate possible storm damage that needs closer inspection.
North Carolina regularly experiences strong storms with high winds and heavy rain. As a result, the roofing materials weaken over time.
During hurricane season, powerful winds and flying debris can lift shingles and expose the roof structure to water intrusion.
The state’s humid climate allows moisture to build up on roofing materials. Over time, this can lead to mold growth, wood rot, and weakened roof decking.
Many homes have roofs that are more than 15–20 years old. Older shingles become brittle and are more likely to crack, curl, or break during storms.
Small roofing problems often go unnoticed. Without regular inspections, minor damage can worsen and turn into leaks or structural issues.
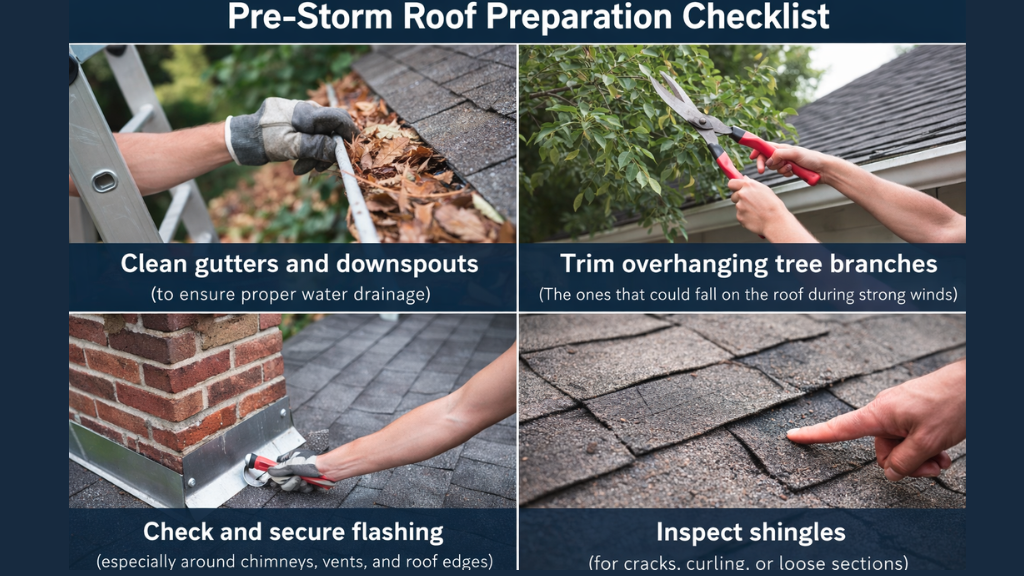
Taking a few preventive steps before a storm can help reduce the risk of roof damage. Use this quick checklist to prepare your roof for severe weather.
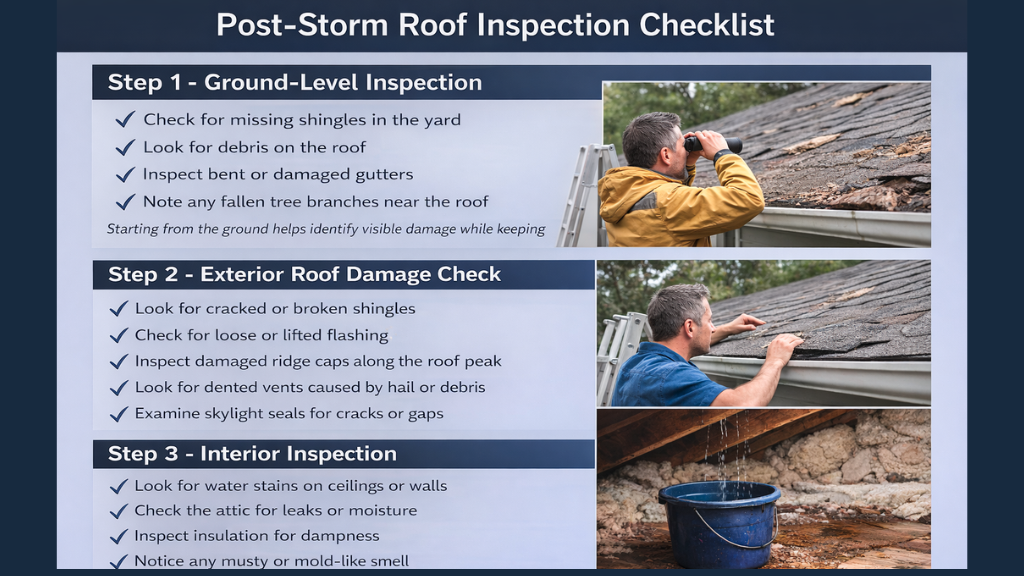
After a storm passes, inspecting your roof can help identify damage early. Follow this step-by-step checklist to check both the exterior and interior areas of your home.
Starting from the ground helps identify visible damage while keeping the inspection safe.
If it is safe to do so, take a closer look at the roof’s exterior.
Roof damage can also appear inside the home. So,
Interior water stains often indicate hidden roof leaks that developed after the storm.
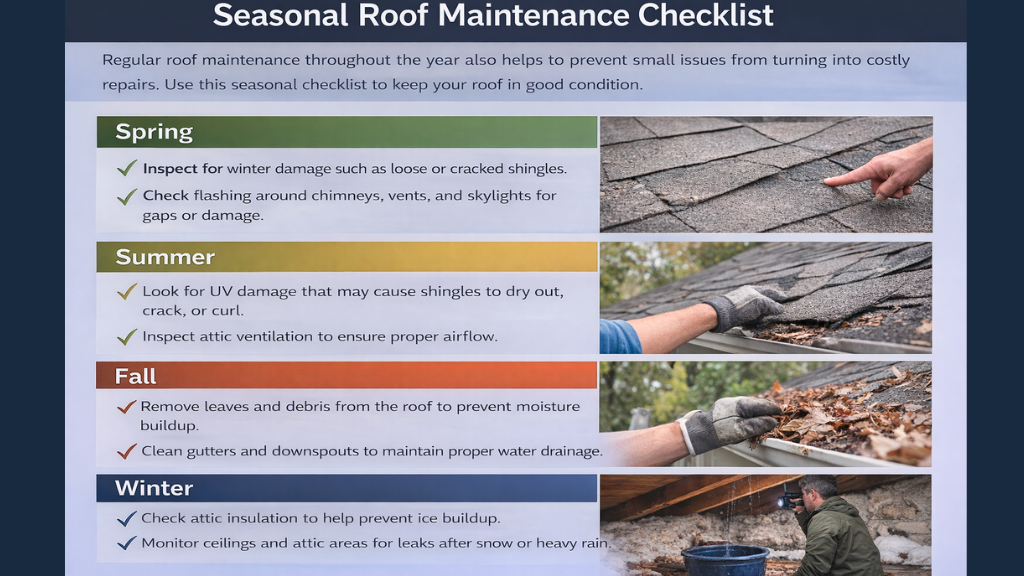
Regular roof maintenance throughout the year also helps to prevent small issues from turning into costly repairs. Use this seasonal checklist to keep your roof in good condition.
Regular inspections twice a year and after storms help prevent expensive roof repairs.
Along with seasonal maintenance, homeowners in North Carolina should take extra precautions before hurricane season. This usually runs from June through November. It brings strong winds, heavy rain, and flying debris that can quickly damage roofing systems.
So, preparing your roof ahead of time can help reduce the risk of serious storm damage.
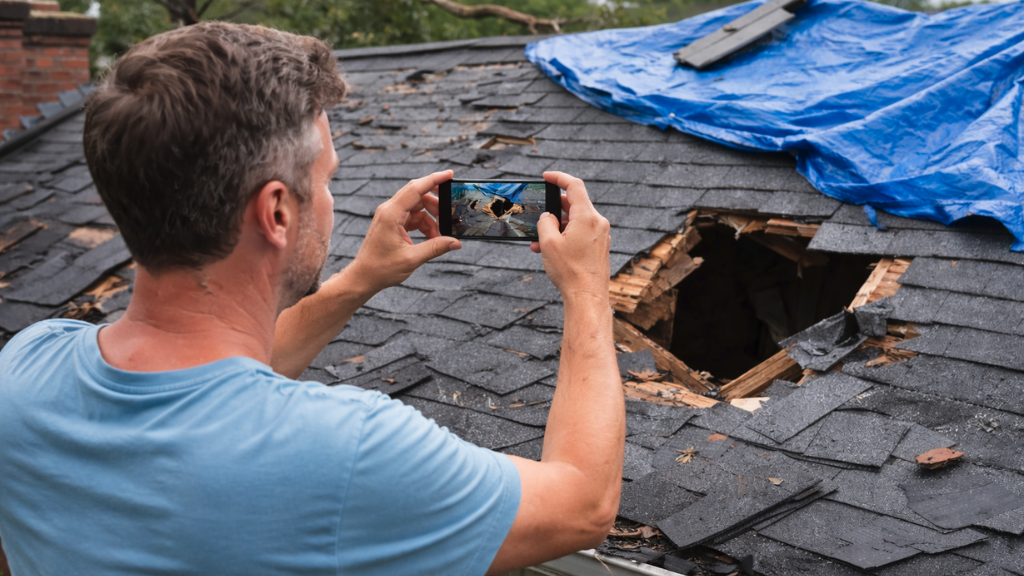
Proper documentation is very important for homeowners filing a roof insurance claim after a storm or weather-related damage. Following a clear checklist can improve your chances of claim approval.
Checklist –
Remember, detailed documentation can make a big difference in the success of a roof insurance claim after storm damage.
Even with regular seasonal maintenance and hurricane preparations, some roof issues require professional attention. Watch for signs that indicate it’s time to call a licensed roofer.
Signs that you need professional help –
Experts like Statewide Roofing Specialist can detect hidden damage that may not be visible from the ground or during a basic self-check. We also assist homeowners with the documentation process for a roof insurance claim. This makes filing easier and maximises coverage.
Homeowners insurance typically covers roof damage caused by sudden and accidental events, such as storms, hail, strong winds, fire, or falling debris. It may also cover damage from events like lightning or vandalism. However, normal wear and tear, poor maintenance, or aging roofs are usually not covered.
The most expensive part of replacing a roof is usually labor and roofing materials, especially shingles or metal panels. Labor costs are high because installation requires skilled work, safety measures, and time. Structural repairs or replacing damaged decking can also significantly increase the total cost.
The 25% rule in roofing refers to a requirement in the Florida Building Code. It states that if more than 25% of a roof is damaged or replaced within a 12-month period, the entire roofing system must be brought up to current building code standards.
In North Carolina, the life expectancy of a roof usually depends on the material. Most homes have asphalt shingle roofs, which typically last about 15–30 years.
More durable materials last longer; for example, metal roofs can last 40–70 years, while tile or slate roofs may last 50 years or more with proper maintenance.
The average cost of a new roof in North Carolina is typically $8,000 to $20,000 for a standard home with asphalt shingles, depending on the roof size, materials, and labor. For an average 2,000–2,200 sq. ft. home, many homeowners pay around $10,000–$20,000, while premium materials like metal or slate can push the price above $30,000.


