Oct 13, 2026
Green Bay Hail Damage Roof Replacement: GAF Timberline HDZ in Barkwood



Key Takeaways
|
Installing a metal roof involves more than simply fastening panels to a roof deck. Every step, from preparing the roof deck and installing the underlayment to securing the panels, flashing, and ridge caps, must be completed correctly to ensure long-term durability, weather protection, and manufacturer warranty compliance. Even small installation mistakes can lead to leaks, corrosion, or premature roof failure.
So, how do you install a metal roof the right way? In this guide, we’ll walk you through the complete installation process step by step. You’ll learn the tools and materials you’ll need, how to install both standard and standing seam metal roofing, common underlayment and installation mistakes to avoid, and answers to frequently asked questions.
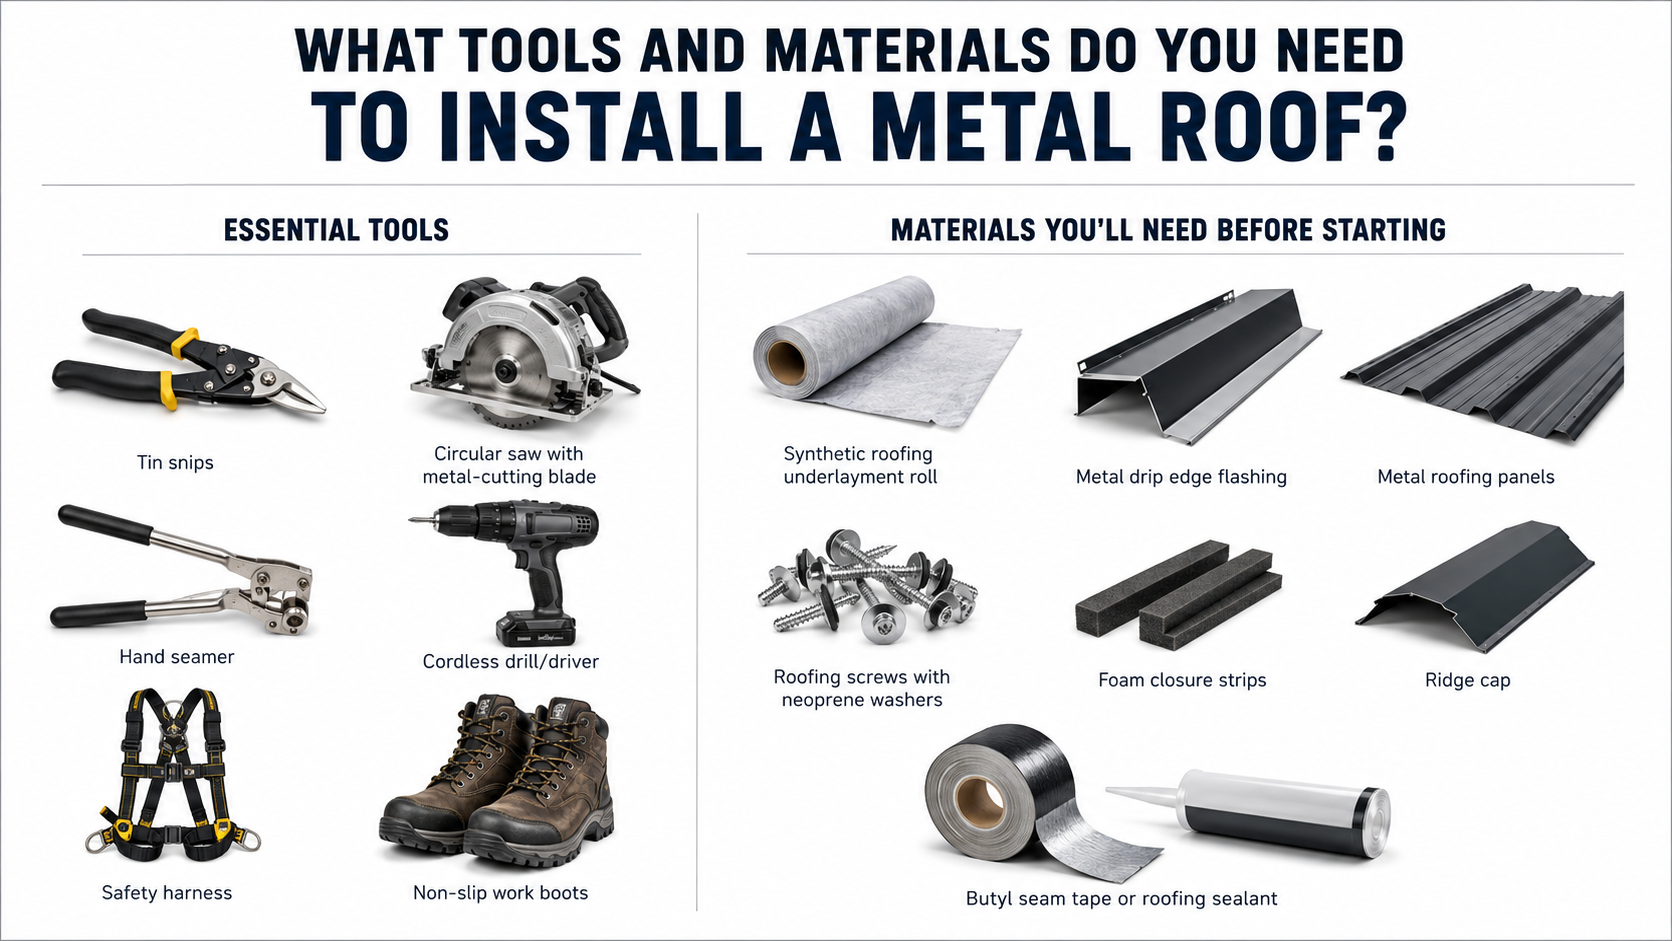
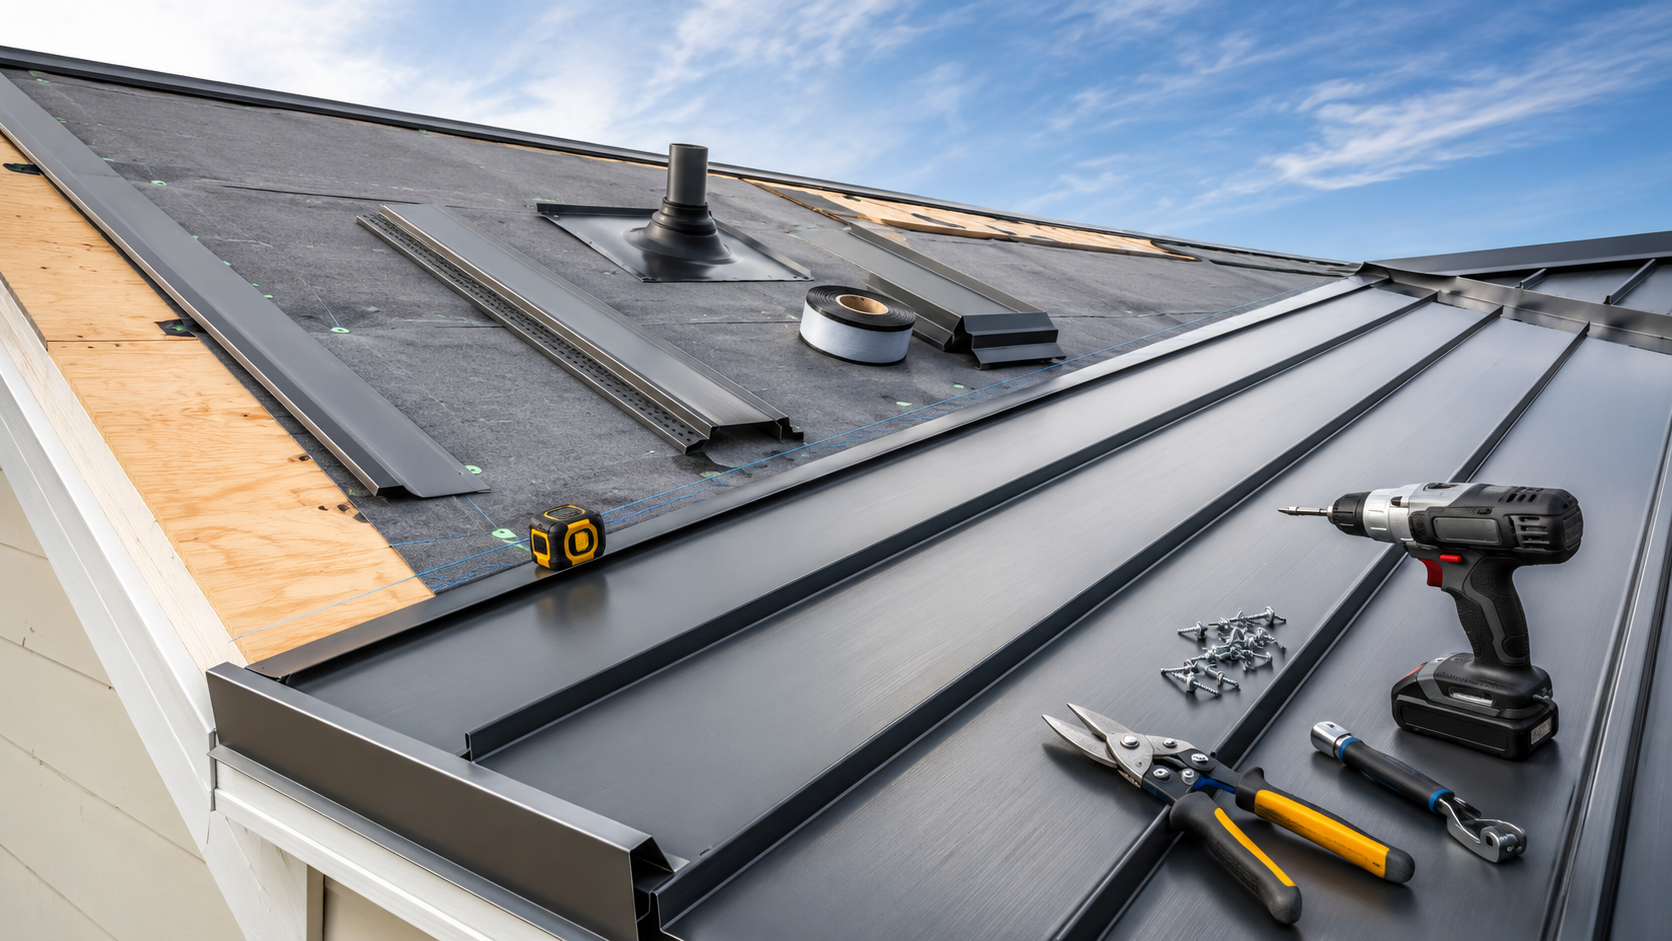
A metal roof installation requires a specific set of cutting, fastening, and safety tools, plus several layers of material beyond the panels themselves.
Panel and material costs vary widely by metal type; our metal roofing cost guide breaks down pricing by material if you’re still budgeting.
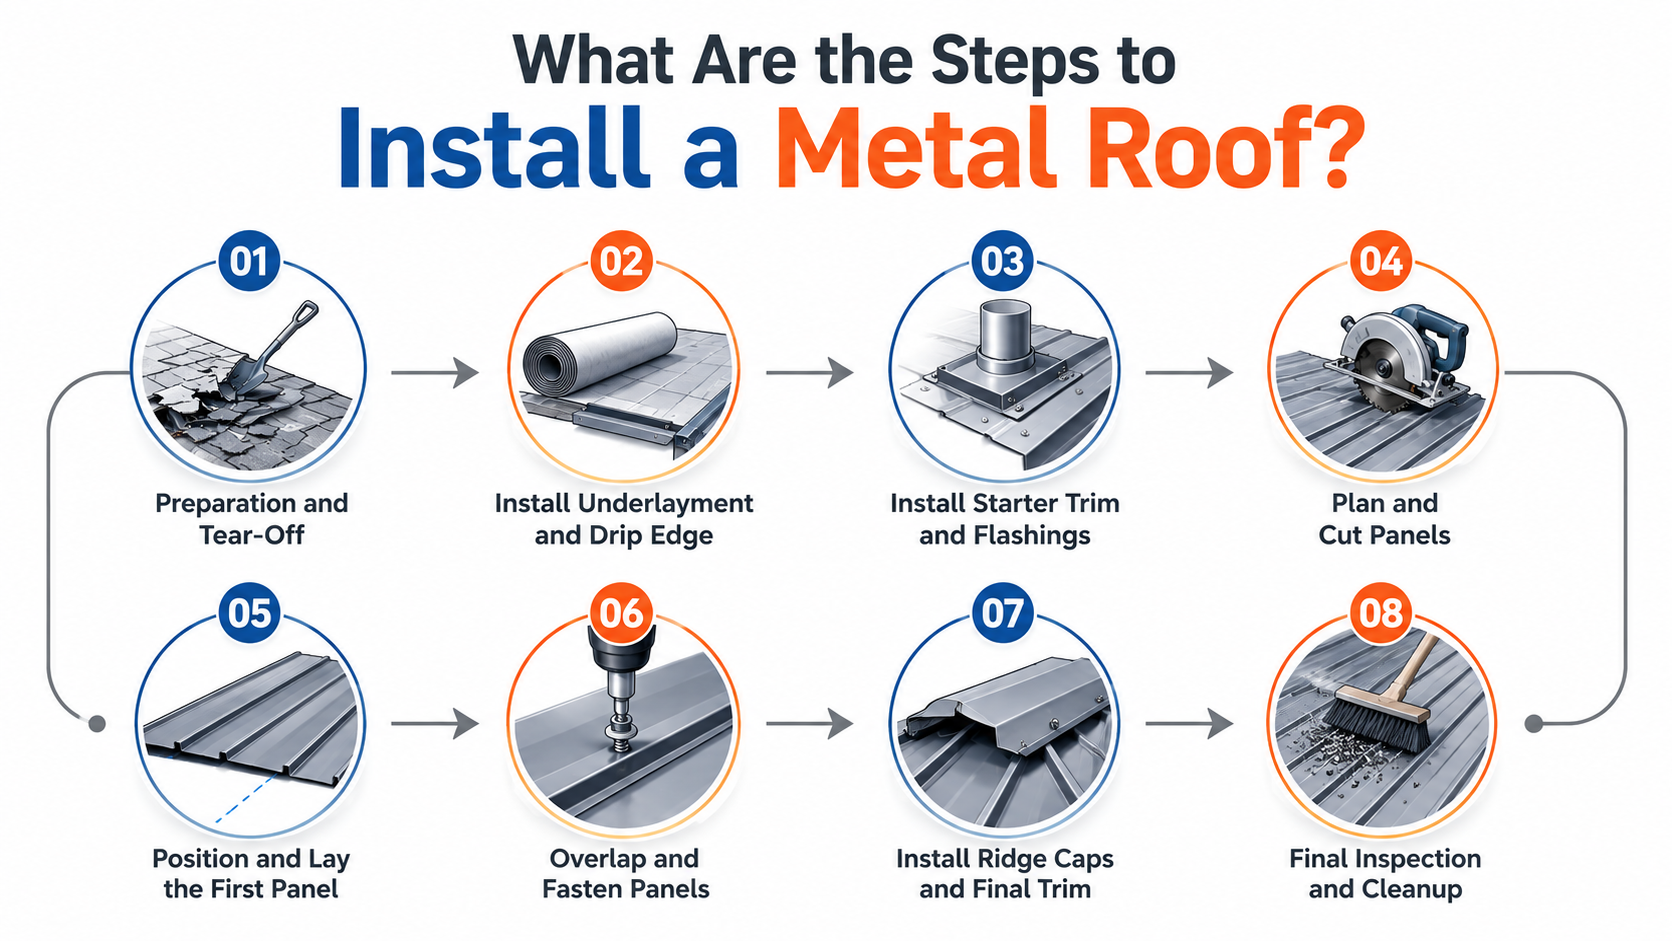
Installing a metal roof involves removing the old roof, preparing the roof deck, installing underlayment and flashing, laying metal panels, securing ridge caps, and performing a final inspection. Following the manufacturer’s installation instructions at every stage is essential to ensure proper performance and maintain the product warranty.
The first step in metal roof installation is removing the existing roofing material and inspecting the roof deck. Strip the roof down to the sheathing, replace any damaged or rotted decking, and remove all nails and debris to create a clean, stable surface for installation.
The next step is installing underlayment and drip edge to protect the roof from moisture. Apply an ice and water shield along eaves and valleys, then cover the remaining roof deck with synthetic underlayment. Finish by installing a metal drip edge around the roof perimeter to direct water away from the decking.
Starter trim and flashing create a watertight base before the metal panels are installed. Install the eave trim first, followed by rake trim along the roof edges. Add flashing around chimneys, skylights, vents, and wall intersections to prevent water intrusion.
Metal panels should be measured and cut accurately before installation begins. Order factory-cut panels whenever possible or trim them on-site using aviation snips or electric shears. Avoid abrasive saw blades, as they can damage the protective coating and increase the risk of corrosion.
The first metal panel must be installed squarely to ensure the entire roof aligns correctly. Snap a chalk line as a guide, leave the manufacturer-recommended overhang beyond the drip edge, and secure the first panel with temporary fasteners before installing the remaining panels.
Each metal panel should overlap correctly and be fastened according to the manufacturer’s specifications. Use self-tapping roofing screws with neoprene washers for exposed-fastener systems or concealed clips for standing seam systems. Fasteners should be tightened enough to seal the washer without over-compressing it.
Ridge caps and trim seal the roof and protect it from wind-driven rain. Install closure strips beneath the ridge cap, then secure the cap along the roof peak. Apply butyl tape and approved sealant where required to waterproof panel joints and roof transitions.
The final step is inspecting the completed roof and cleaning the work area. Check for loose fasteners, scratches, exposed gaps, or improperly sealed areas. Remove all metal shavings and construction debris, as leftover filings can rust and stain the finished roof surface.
Metal roofing comes in several styles, each with different designs, fastening methods, costs, and performance benefits. Understanding the available options helps homeowners choose the right roofing system based on durability, maintenance needs, appearance, and budget.
| Metal Roofing Type | Installation Method | Key Features |
| Standing Seam Metal Roofing | Installed using concealed clips or fasteners, with panels locked together at raised seams | Hidden fasteners, improved weather resistance, low maintenance, and long lifespan |
| Ribbed or R Panel Metal Roofing | Panels are fastened directly through the ribs into the roof structure using exposed screws | Strong, economical, widely used for residential, commercial, and agricultural buildings |
| Corrugated Metal Roofing | Overlapping metal sheets are secured with exposed fasteners and sealed at panel joints | Lightweight, durable, and commonly used for residential and agricultural buildings |
| Stone-Coated Steel Roofing | Interlocking steel panels or shingles are installed over underlayment | Offers the appearance of traditional roofing materials with metal durability |
| Metal Shingle Roofing | Individual metal shingles are installed in overlapping rows similar to asphalt shingles | Provides a traditional look with long-term metal roofing performance |
Note: Standing seam metal roofing is one of the most popular choices among homeowners because of its durability, clean appearance, hidden fasteners, and long-term performance. If you want to learn more about this roofing system, check out our detailed guide on standing seam metal roofing installation.
Underlayment problems cause more metal roof leaks than the panels themselves, usually from incorrect overlap or the wrong underlayment type for the climate.
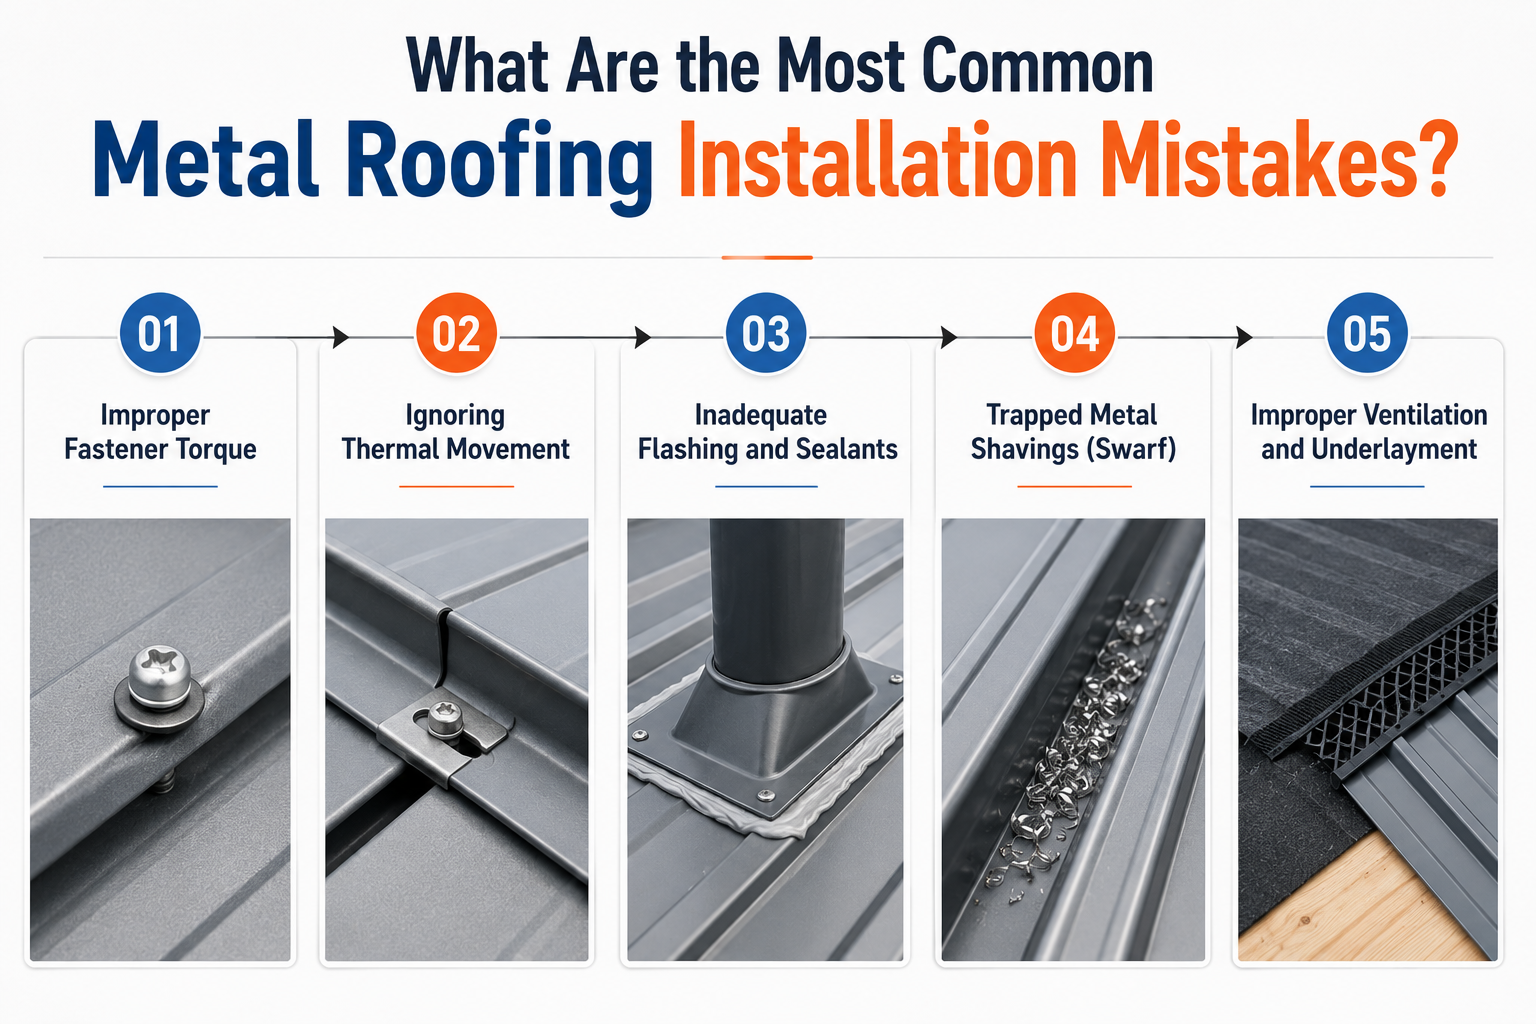
Metal roofing performs well only when it is installed correctly. The most common installation mistakes include incorrect fastener installation, restricted thermal movement, poor flashing, leftover metal shavings, and inadequate ventilation or underlayment. Preventing these issues helps reduce the risk of leaks, corrosion, panel damage, and premature roof failure.
A metal roof is a long-term investment, but its performance depends on proper installation. Following the correct installation process, using quality materials, and avoiding common mistakes helps maximize durability, energy efficiency, and weather protection. For the best results, work with an experienced roofing contractor who follows manufacturer guidelines and local building codes.
At Statewide Roofing Specialist, our team delivers professional metal roof installations using premium materials and proven installation practices, helping homeowners protect their investment with a roof built to last.
In most areas, yes. A building permit is typically required for a metal roof installation because it involves structural and weatherproofing work. Permit requirements vary by city and county, so check with your local building department before starting the project to ensure compliance with local building codes.
The best underlayment for a metal roof is typically a high-temperature synthetic underlayment. It withstands the higher temperatures generated by metal panels, provides better tear resistance than traditional felt, and offers superior moisture protection. In areas prone to ice dams or heavy rain, an ice-and-water shield is also recommended along eaves and valleys.
Yes, but DIY metal roof installation is only recommended for experienced homeowners with the proper tools and safety equipment. Installing a metal roof requires accurate panel alignment, proper flashing installation, and correct fastener placement. Mistakes can lead to leaks, void the manufacturer’s warranty, and reduce the roof’s lifespan. Hiring a professional is often the safest and most reliable option.
A properly installed metal roof typically lasts 40 to 70 years, depending on the material, roof design, and maintenance. Standing seam systems generally last longer than exposed-fastener panels because their concealed fasteners reduce the risk of leaks and weather-related wear. Regular inspections and prompt repairs can further extend the roof’s service life.